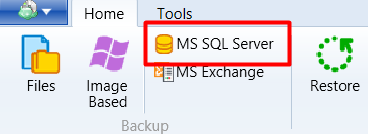
To start working with backup client for MS SQL Server, install and launch it, then click on "MS SQL Server" button in the top bar.
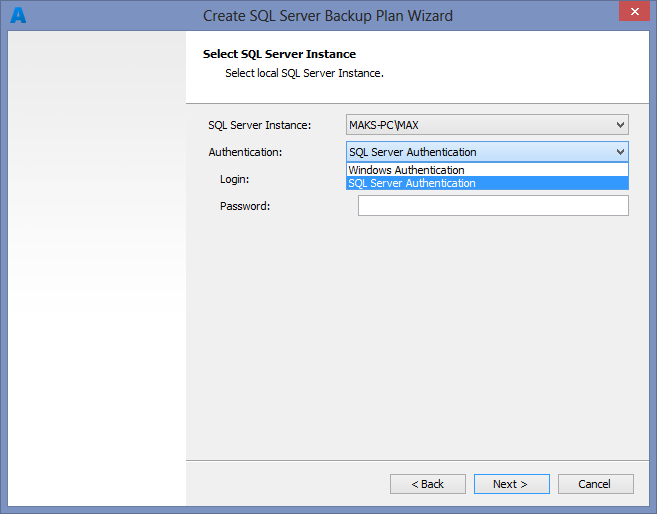
In the backup wizard you will need to select SQL Server instance and the authentication method. You can choose either SQL Server or Windows authentication. After selection of preferable authentication method you'll be asked to enter your username and a password.

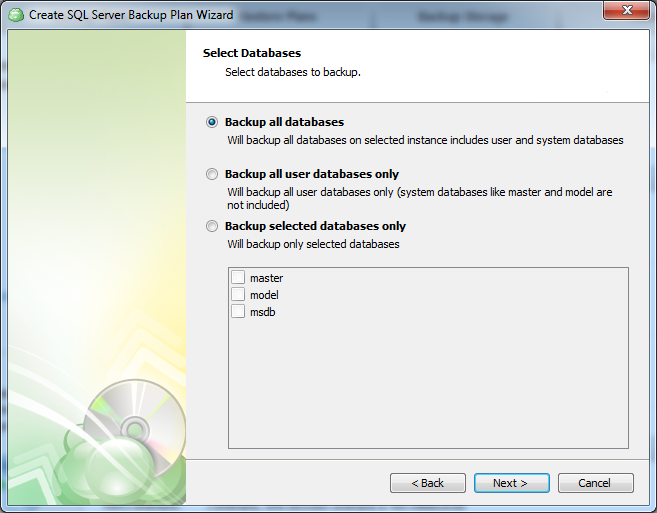
On the next step user can choose proper databases to backup. Option list allows you to choose whether you need to backup all your databases, only user databases or to select particular database manually.
Next step is a compression and encryption options setup. If you use MS SQL Server 2008 or higher, compression will be performed by SQL Server. If not, compression will be performed by the backup software. Encryption is already set to SSE (Server Side Encryption ) by default.
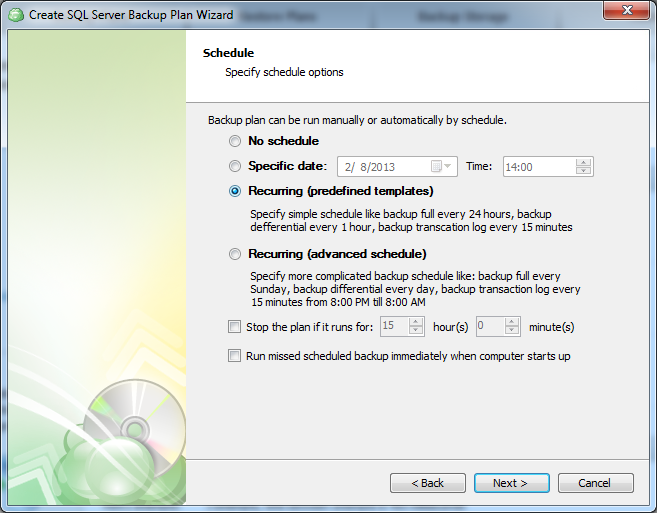
Then you'll have to specify schedule options. You can run a backup plan manually or can setup the application to backup your files automatically. Program can be set on automatic backup at a certain time on a schedule or at user-specified intervals. User can choose whether to use predefined templates or configure advanced schedule.
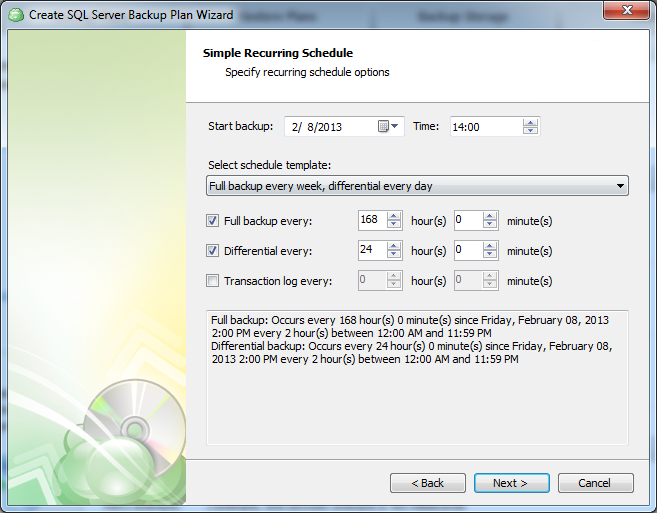
On the next step you'll need to specify the start date and select schedule template.
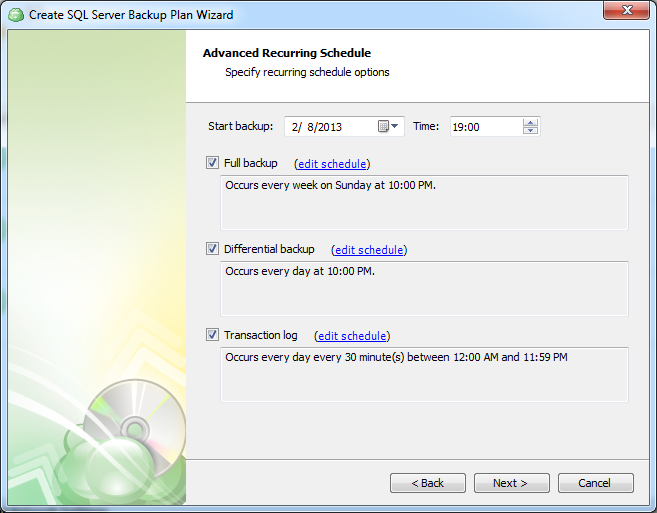
If you've chosen an advanced schedule mode, you'll be asked to set options for full backup, differential backup and transaction log backup. Here you can set date, time and frequency for each backup type. Also on this step you'll have to define the start date to run your first backup.
On the summary page you can overview the backup plan options and run backup plan.

How to Restore MS SQL Database
Run MediBackup client if you working on the same pc and have MediBackup client software installed.
If you are restoring to another pc after a dead old hardware, then first you need to download the client software from the download link in our website. once it's installed you will be running in trial mode to allow you to restore. when first running the software it should prompt you with the wizard to add you account, you need to enter your MediBackup username and password, for the edition choose MS SQL Edition and tick the box where it says Restore Only Edition.
Now you can browse your existing backups by navigating to Backup Storage Tab inside the software, from the Tree on the left expand til you get to the dead pc name and see it's sub tree, on the right you will be able to see all the backups where you can simply right click any file or backup node and click restore to start the Restore wizard.
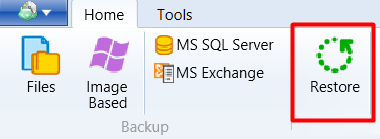
Click the "Restore" icon.
Use the Restore Wizard to select a cloud storage where to restore from.
On the "Plan Name" screen, select whether to run the restore just once or to save a created restore plan for the further runs. Click "Next".

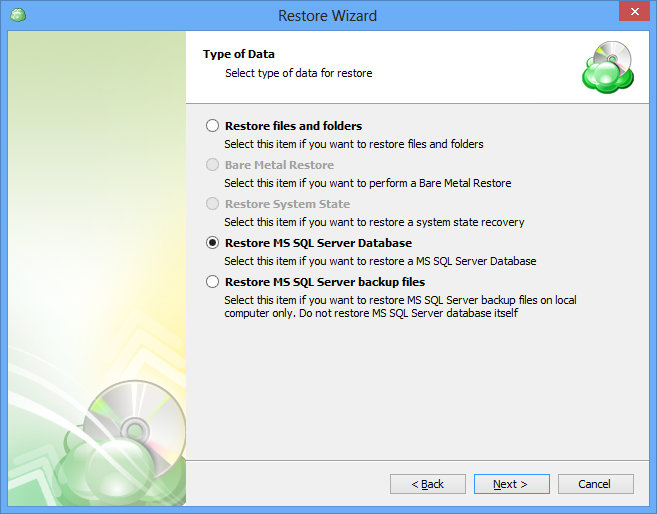
Select one of the options:
- "Restore MS SQL Server Database" (restores MS SQL Server database to selected SQL Server)
- "Restore MS SQL Server backup files" (just downloads database backup files)
Click "Next".
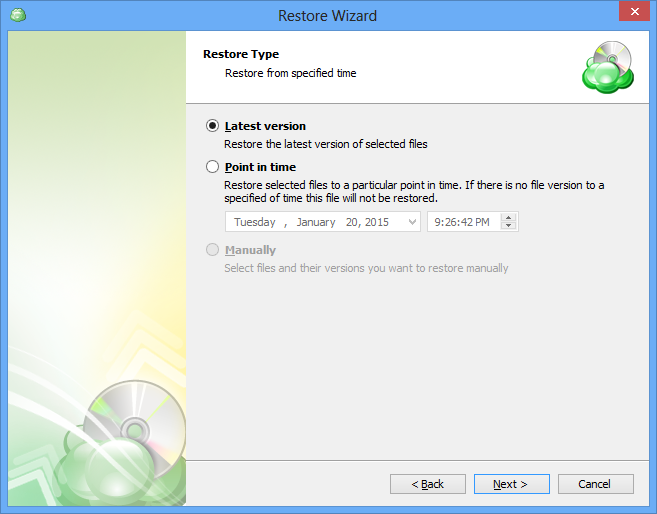
Select one of the version options for the data to be restored:
- Latest version
- Point in time
Click "Next".
For Restore MS SQL Server Database: select SQL Server Instance from the drop-down list and choose the type of Authentication.

For SQL Server Authentication:
Specify your Login and Password.
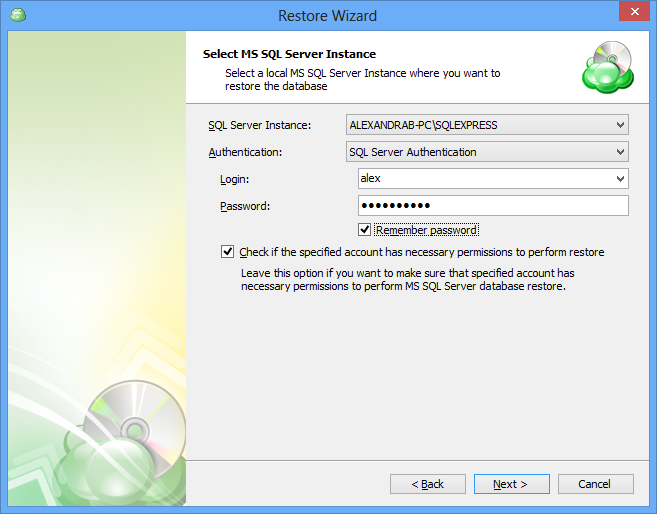
Click "Next".
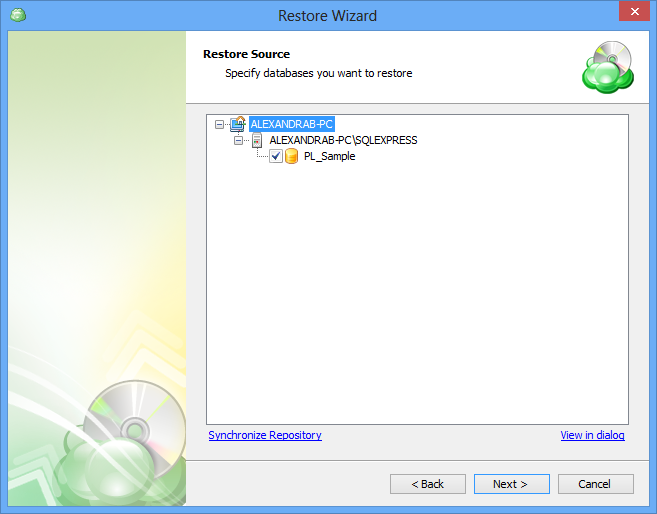
Select the databases to be restored. Click "Next".
For "Restore MS SQL Server Database" only:
You may take one or two actions:
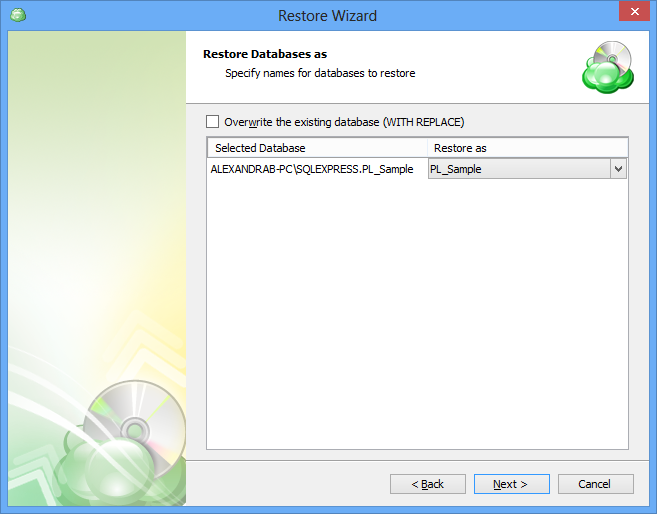
- You can change original database name to restore it under another name,
- You can overwrite existing database using "Overwrite the existing database" option.
Click "Next".
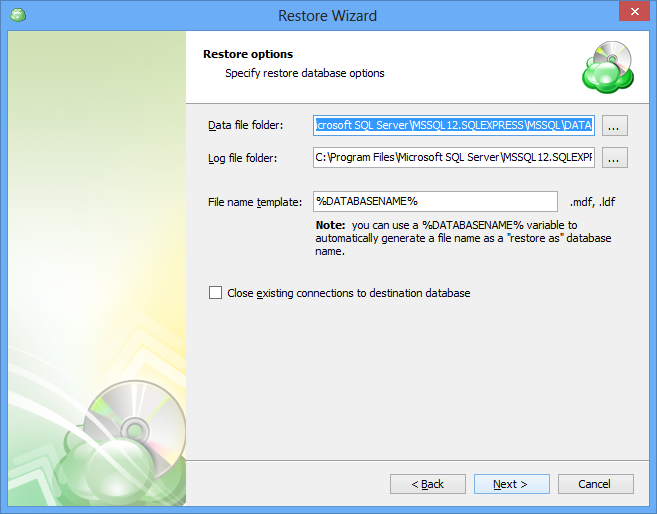
For "Restore MS SQL Server Database" only:
Select Data file folder and Log file folder. Specify a File name template.
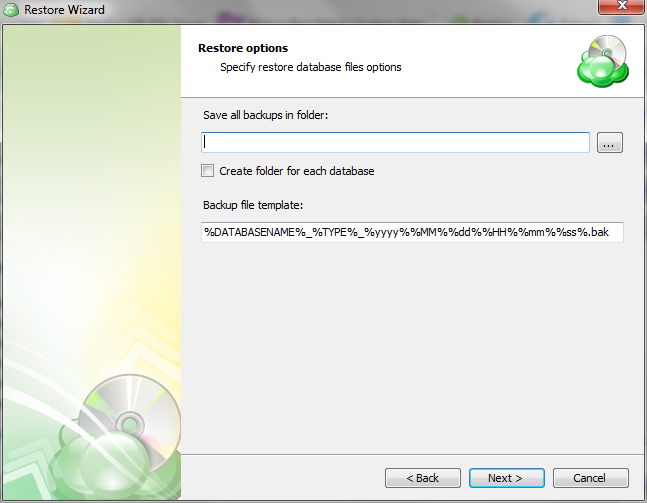
For "Restore MS SQL Server backup files" only:
Specify a destination folder and a backup file template. Click "Next".
For the data encrypted on the client side:
Select the "Decrypt encrypted files with the following password" option. Enter your password and re-enter in to confirm. Click "Next".
For the data backed up With SSE (server-side-encryption):
Specify Smart Restore options.
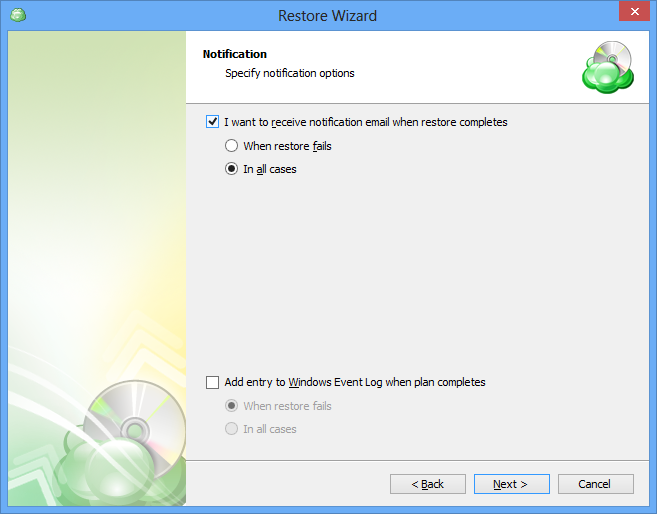
Specify the notifications options. Click "Next".
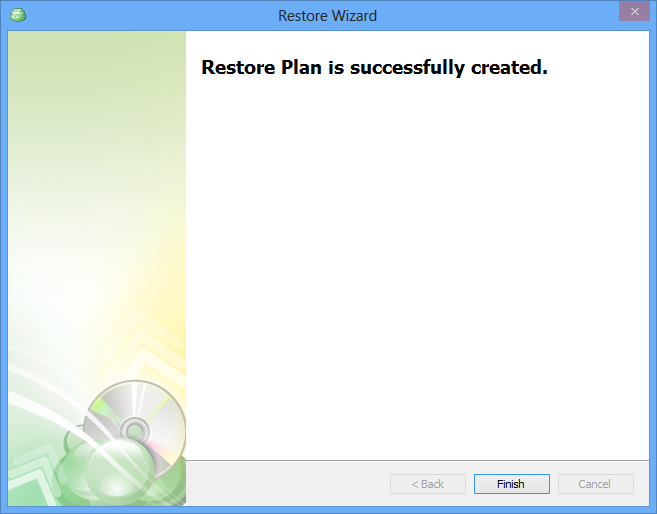
Review the summary. After you are sure that the selected options suits you, click "Next".

Click "Finish" to complete MS SQL restore plan creation.
Once you have created the MS SQL restore plan, you can run it immediately or whenever you want.