Run the Backup client.
Click on the Image Based button.
Select a cloud storage to store your image-based backups.
Specify a name for your backup plan.
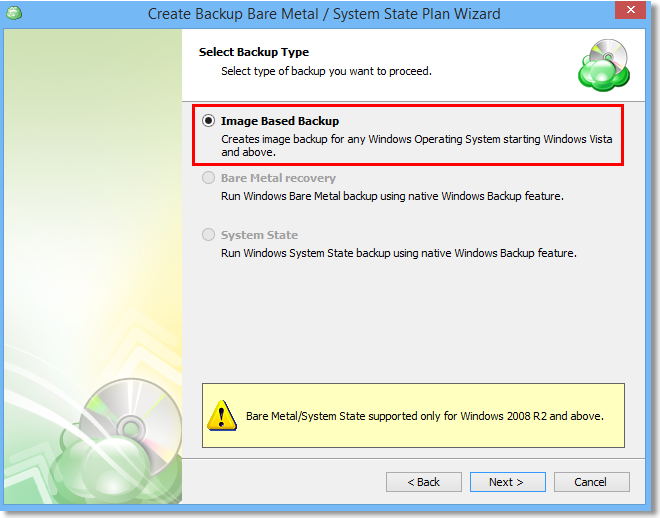
Select Image Based Backup option.
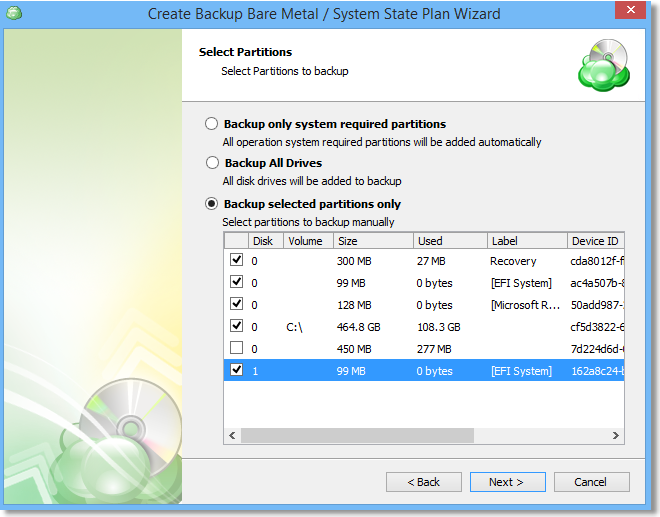
Select the partitions you want to back up and hit Next.
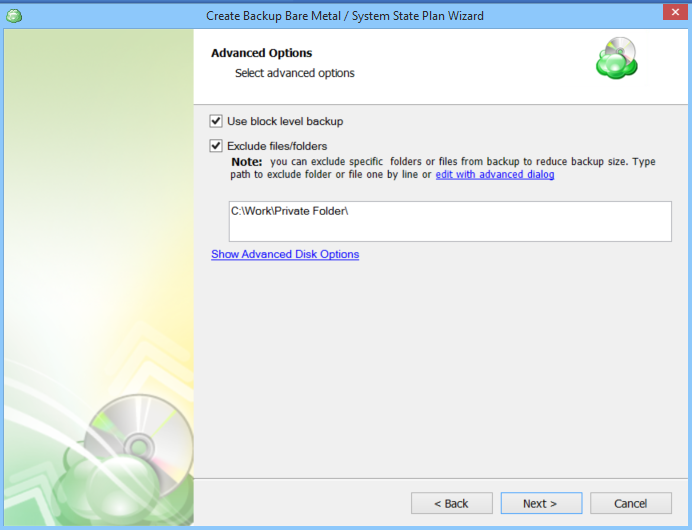
Select files/folders you want to exclude.
Specify encryption and compression options for your backup plan.
Specify Purge options.
Set up the backup schedule.
Specify pre/post actions.
Specify notification options.
See the Summary screen and finish the Backup Wizard.
Now your backup plan is ready! To run it immediately, just check the Run backup now box in the end of the backup plan setup.
How to Recover System from Image Backup
Run the backup client.
Click on the Restore button.
Select a cloud storage to restore your system image file from.
Choose whether you want to run this restore plan just once or to save the plan so you can use it further.
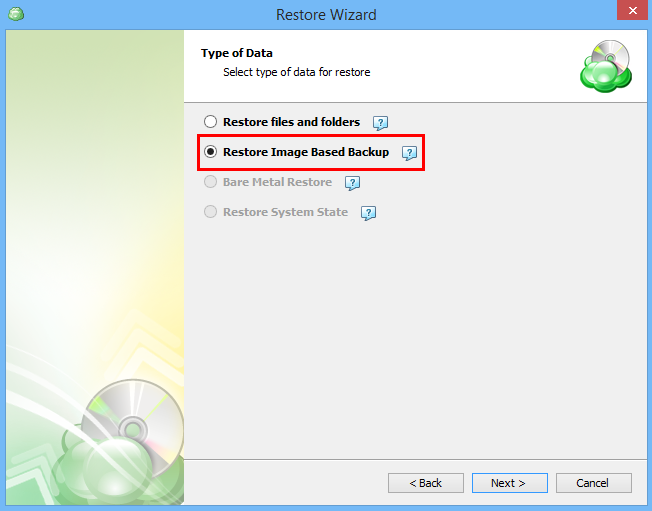
Select Restore Image Based Backup option.
Select the restore type: whether you want to restore the latest version of the files or restore them to a particular point in time.
Choose, whether to restore your image based backup as a physical disk or as a virtual disk.
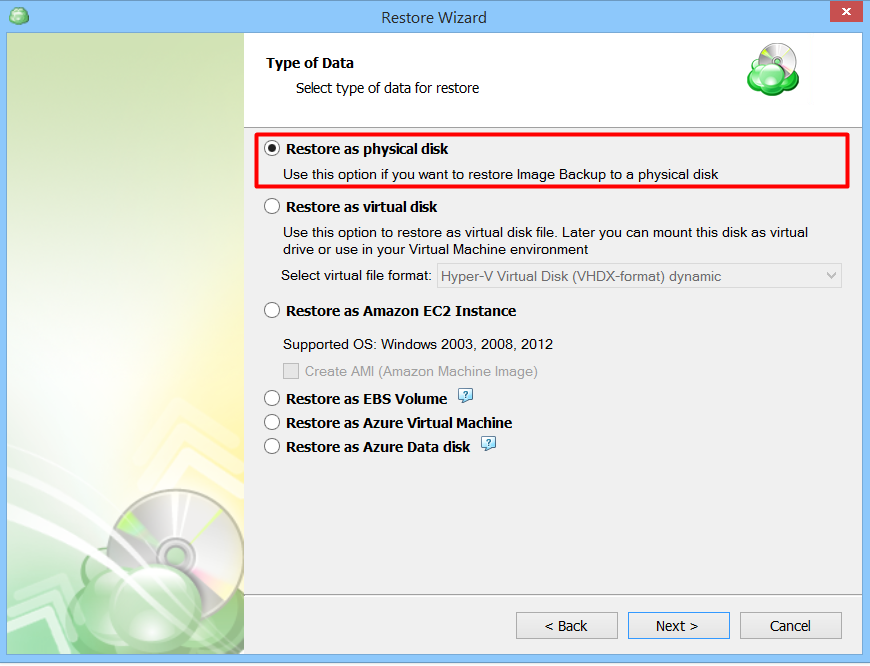
Note: In this article, we select "Restore as physical disc" option to perform the physical to physical restore (P2P Restore).
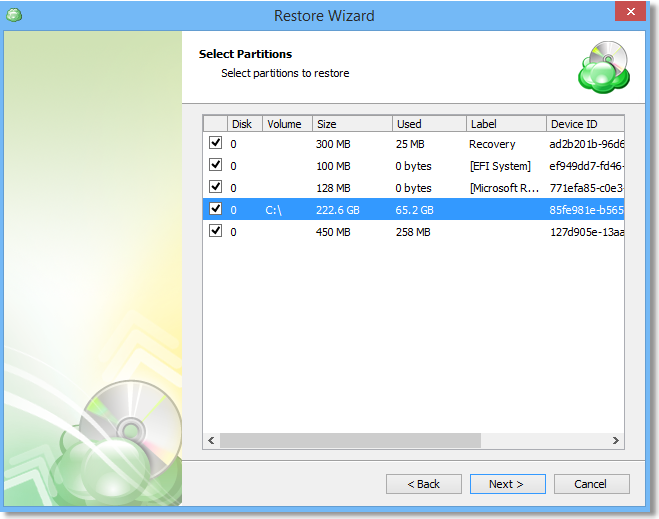
Select the partitions you want to restore.
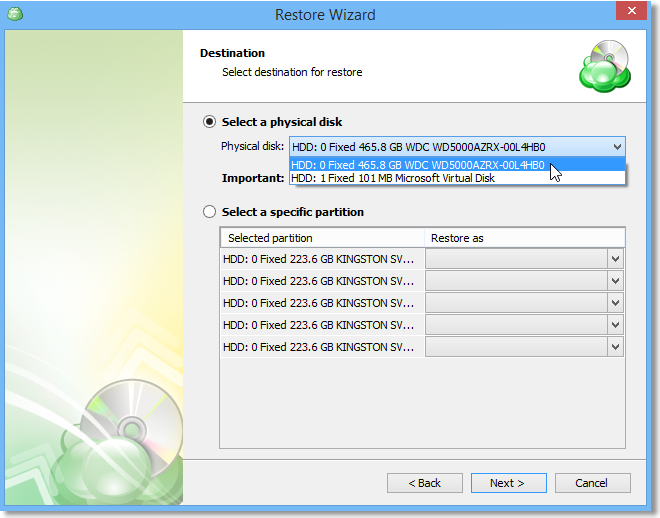
Select the destination for restore: the particular physical disk you would like to restore your image based backup to.
On the Decryption screen, enter the password you've specified in the Backup Wizard (Step 7).
Specify notification options.
See the Summary screen and finish the Restore Wizard. To run a restore plan immediately on the end of the backup plan setup, check Run backup now box.
Resize Disk Option
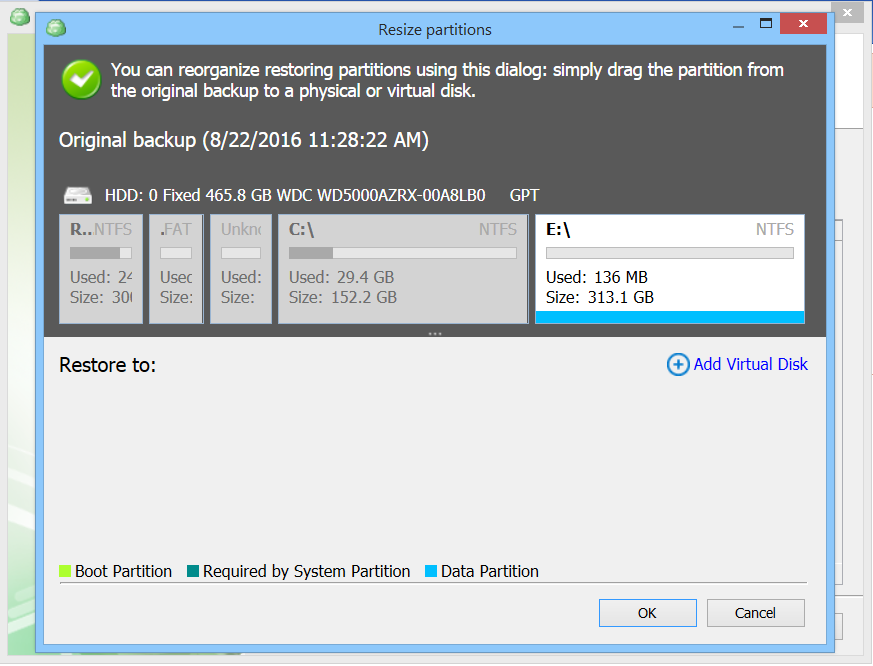
You can also resize selected partitions and restore to several virtual disks.
Restore as a virtual disk
On the Step 7 of the restore guide select Restore as a virtual disk.
Reorganize partitions using advanced dialog.
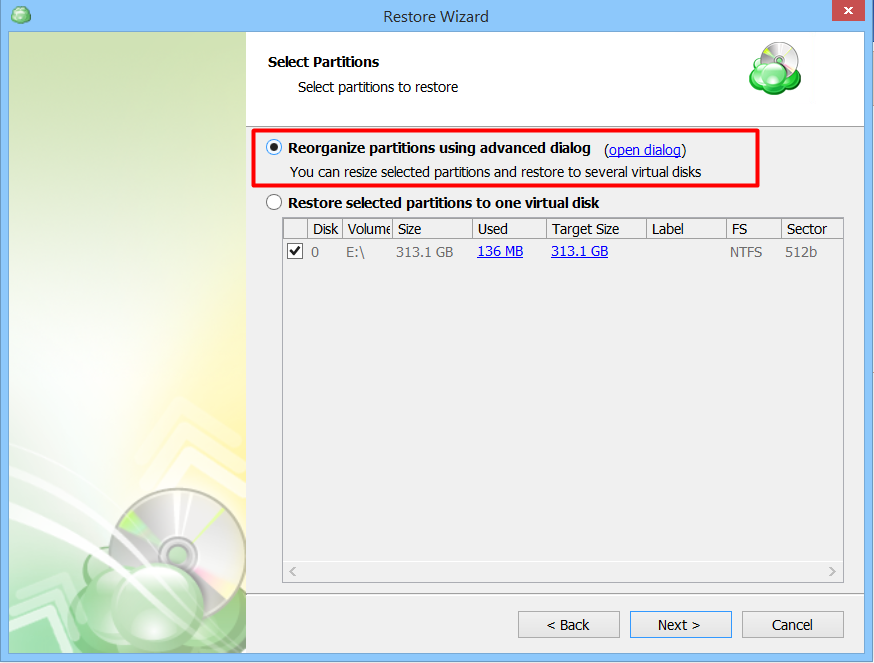
The window will open allowing you to configure virtual partitions.
Restore as a physical disk
Select Restore as a physical disk.
Click on the target size amount of the needed disk.
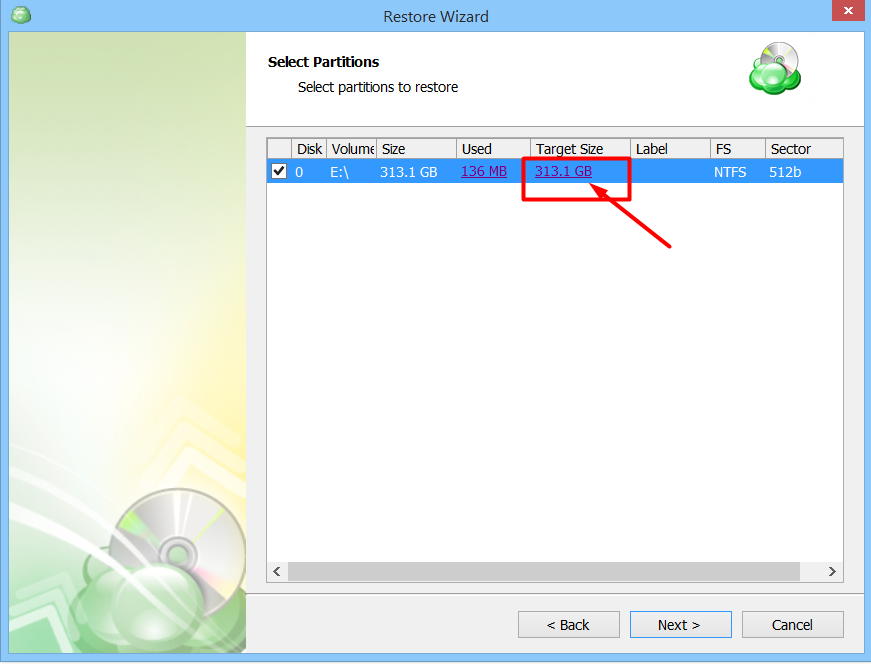
The window will open allowing you to specify custom partition size.

How to Restore Image Based Backup on Another Computer
In some cases, you may need to perform the restore of your system on another computer. To restore your image based backup on another computer just follow the instruction below prior to running the Restore Wizard:
Download and install another copy of MediBackup client on a new computer.
Register exactly the same cloud storage account that used before.
Select the same storage as before.
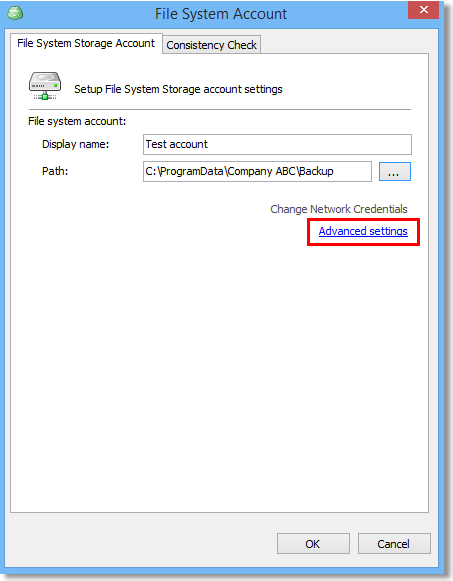
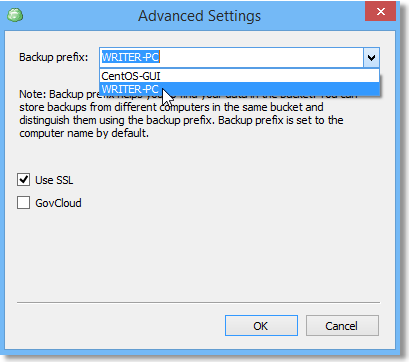
Click on the Advanced settings link to specify the backup prefix.
From the "Backup prefix" drop-down menu, select the same prefix that you used in you previous computer so that MediBackup client can find the data in the specified storage.
The next step is to synchronize the repository in order to retrieve the metadata of all the files associated with the backed up system.
The repository sync will start automatically. Once sync completed, you will be able to see your backups on the Backup Storage tab. If it is not there by some reason, run the repository sync manually:
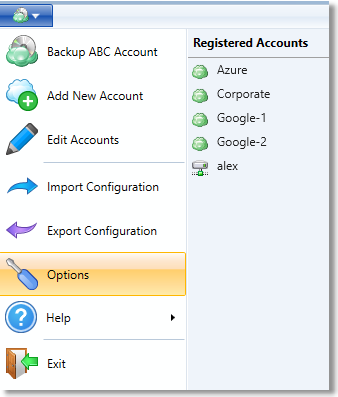
To synchronize the repository, select Options from the drop-down menu located in the top-right corner of the screen.
In the Options dialog, navigate on Repository tab and click Synchronize Repository button.

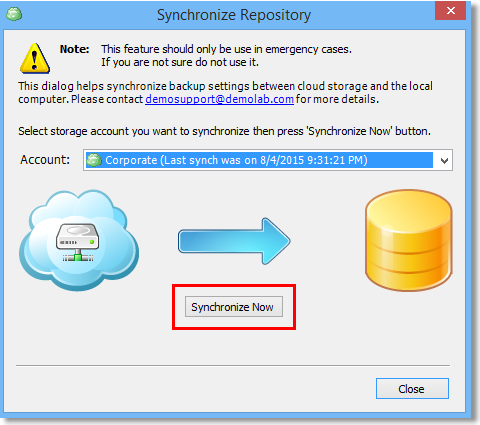
In the Synchronize Repository dialog, select the desired storage account from the Account drop-down list and click Synchronize Now button.
After all the steps required for repository synchronization are done, just go ahead and run the MediBackup Restore Wizard to recover your system from an image based backup.