
With MediBackup desktop client you can create a bootable USB device or a bootable ISO file to use it as Recovery Disk for image system recovery.
How to Create Bootable USB Device
Plug the USB device you want to use as bootable into your computer. Please, note that all information from this device will be permanently removed, so we strongly recommend you to backup all your data from the device in order to avoid losing any valuable data.
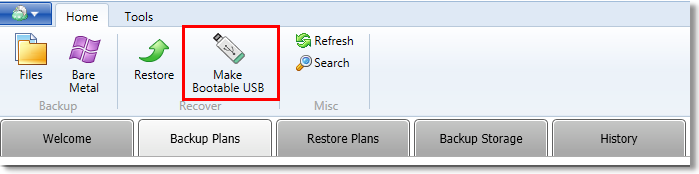
Launch MediBackup client and navigate on Make Bootable USB button on the toolbar.

In the dialog box, specify your USB device from the drop-down list and come up with a Master Password to protect your Recovery Disk. Then hit Create Disk button.
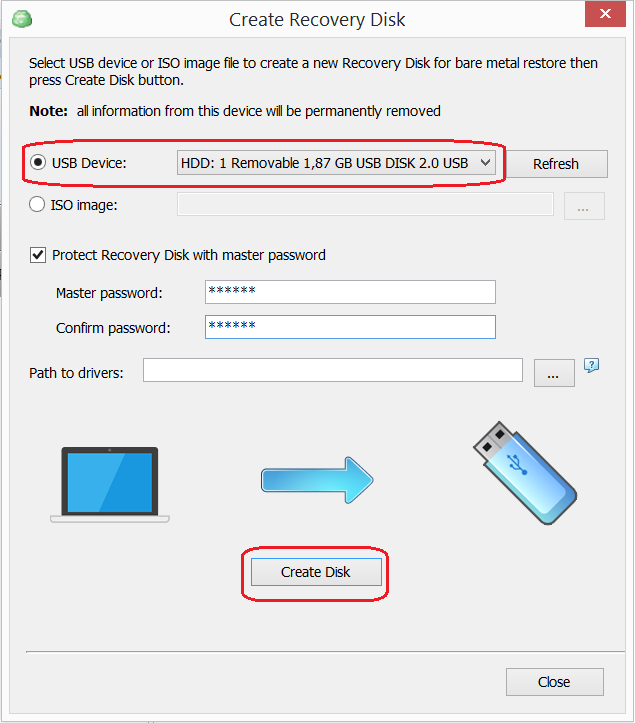
Note: You may also add your own drivers to the bootable USB flash. Just specify the path to the folder that contains the drivers in the Path to drivers field.
Once the process completes, you can go ahead and click Close button. You will have a new folder in your USB device called "Boot".
That's it! Now your bootable USB device is created! You can use it to recover your operating system in case of the system crash.
How to Create Bootable ISO File
Launch MediBackup client and navigate on Make Bootable USB button on the toolbar.
")
In the dialog box, specify a full path for ISO file you want to create. Then hit Create Disk button.
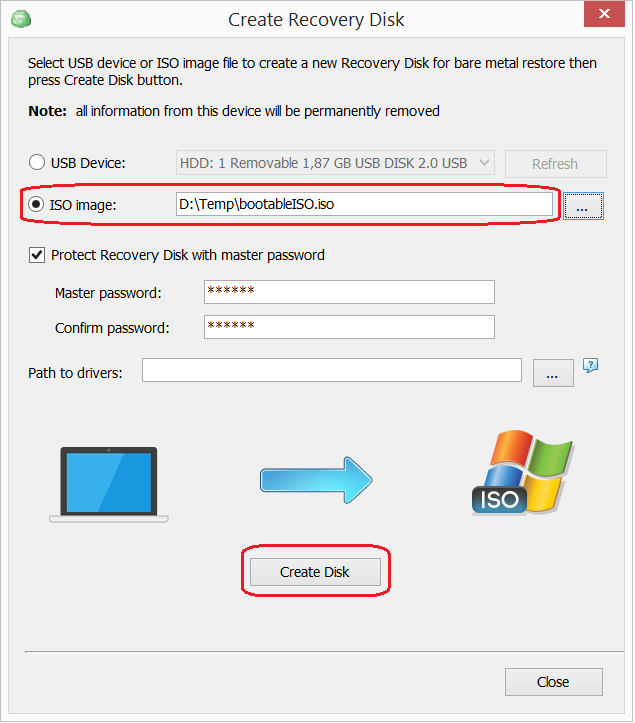
Note: You may also add your own drivers to the bootable ISO file. Just specify the path to the folder that contains the drivers in the Path to drivers field.
Once the process completes, you can go ahead and click Close button.
Now you can use this ISO file to recover your system on another physical or virtual machine by mouting as an external drive.
How to Recover from Bootable USB or ISO File
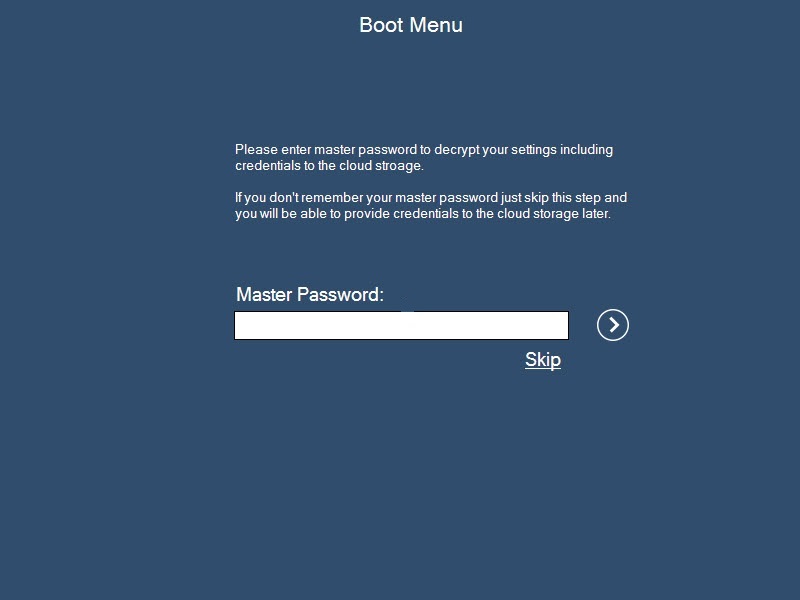
Plug the bootable USB device or mount ISO file as a drive into your computer and restart it.
You will see a welcome screen of the "Boot Menu" where you will be prompted to enter the Master Password that you specified when creating the bootable device (if you did not specify any password, just skip this step).
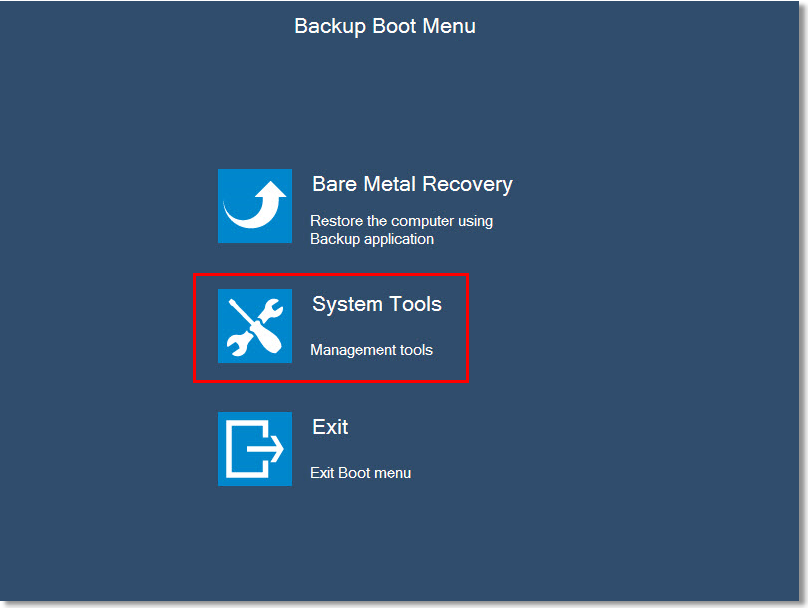
Click Bare Metal Recovery button.

This will start the MediBackup application.
When MediBackup is started, click Restore button on the toolbar to run the Restore Wizard.

Follow the Restore Wizard steps to initiate the recovery process. Just give it some time to complete and enjoy your operating system being up and running!
Note: You may want to take advantage of the management tools in order to perform some specific actions like getting logs or modifying the registry. To find the management tools, just click on System Tools button.
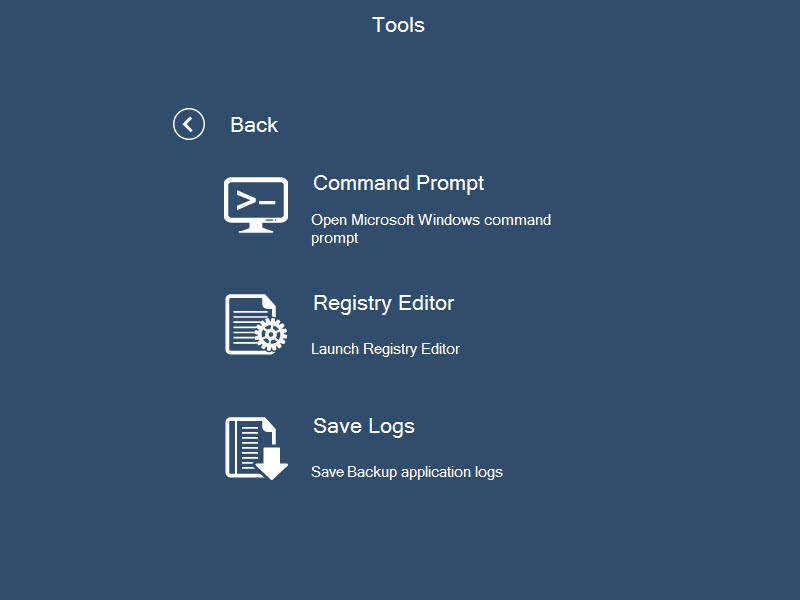
You'll get to the "Tools" screen where you will see three available options: "Command Prompt", "Registry Editor" and "Save Logs".
MediBackup client with its Bootable options is a perfect solution to create bootable USB flash drives or a bootable ISO file. With such a drive, you can always be sure that your operating system with all its components stays recoverable anytime anywhere so the unexpected system crash is no longer a disaster for the business.